Connect Amazon
You approve access once in Seller Central. Nexus then pulls your settlements in the background.
Checked against the product on 2026-11-04
Step 1: Open the Connect Amazon step
In setup this is step 7 of 9, Connect your Amazon account. Later, open Amazon connection under Integrations and Banking to manage it.
Sample data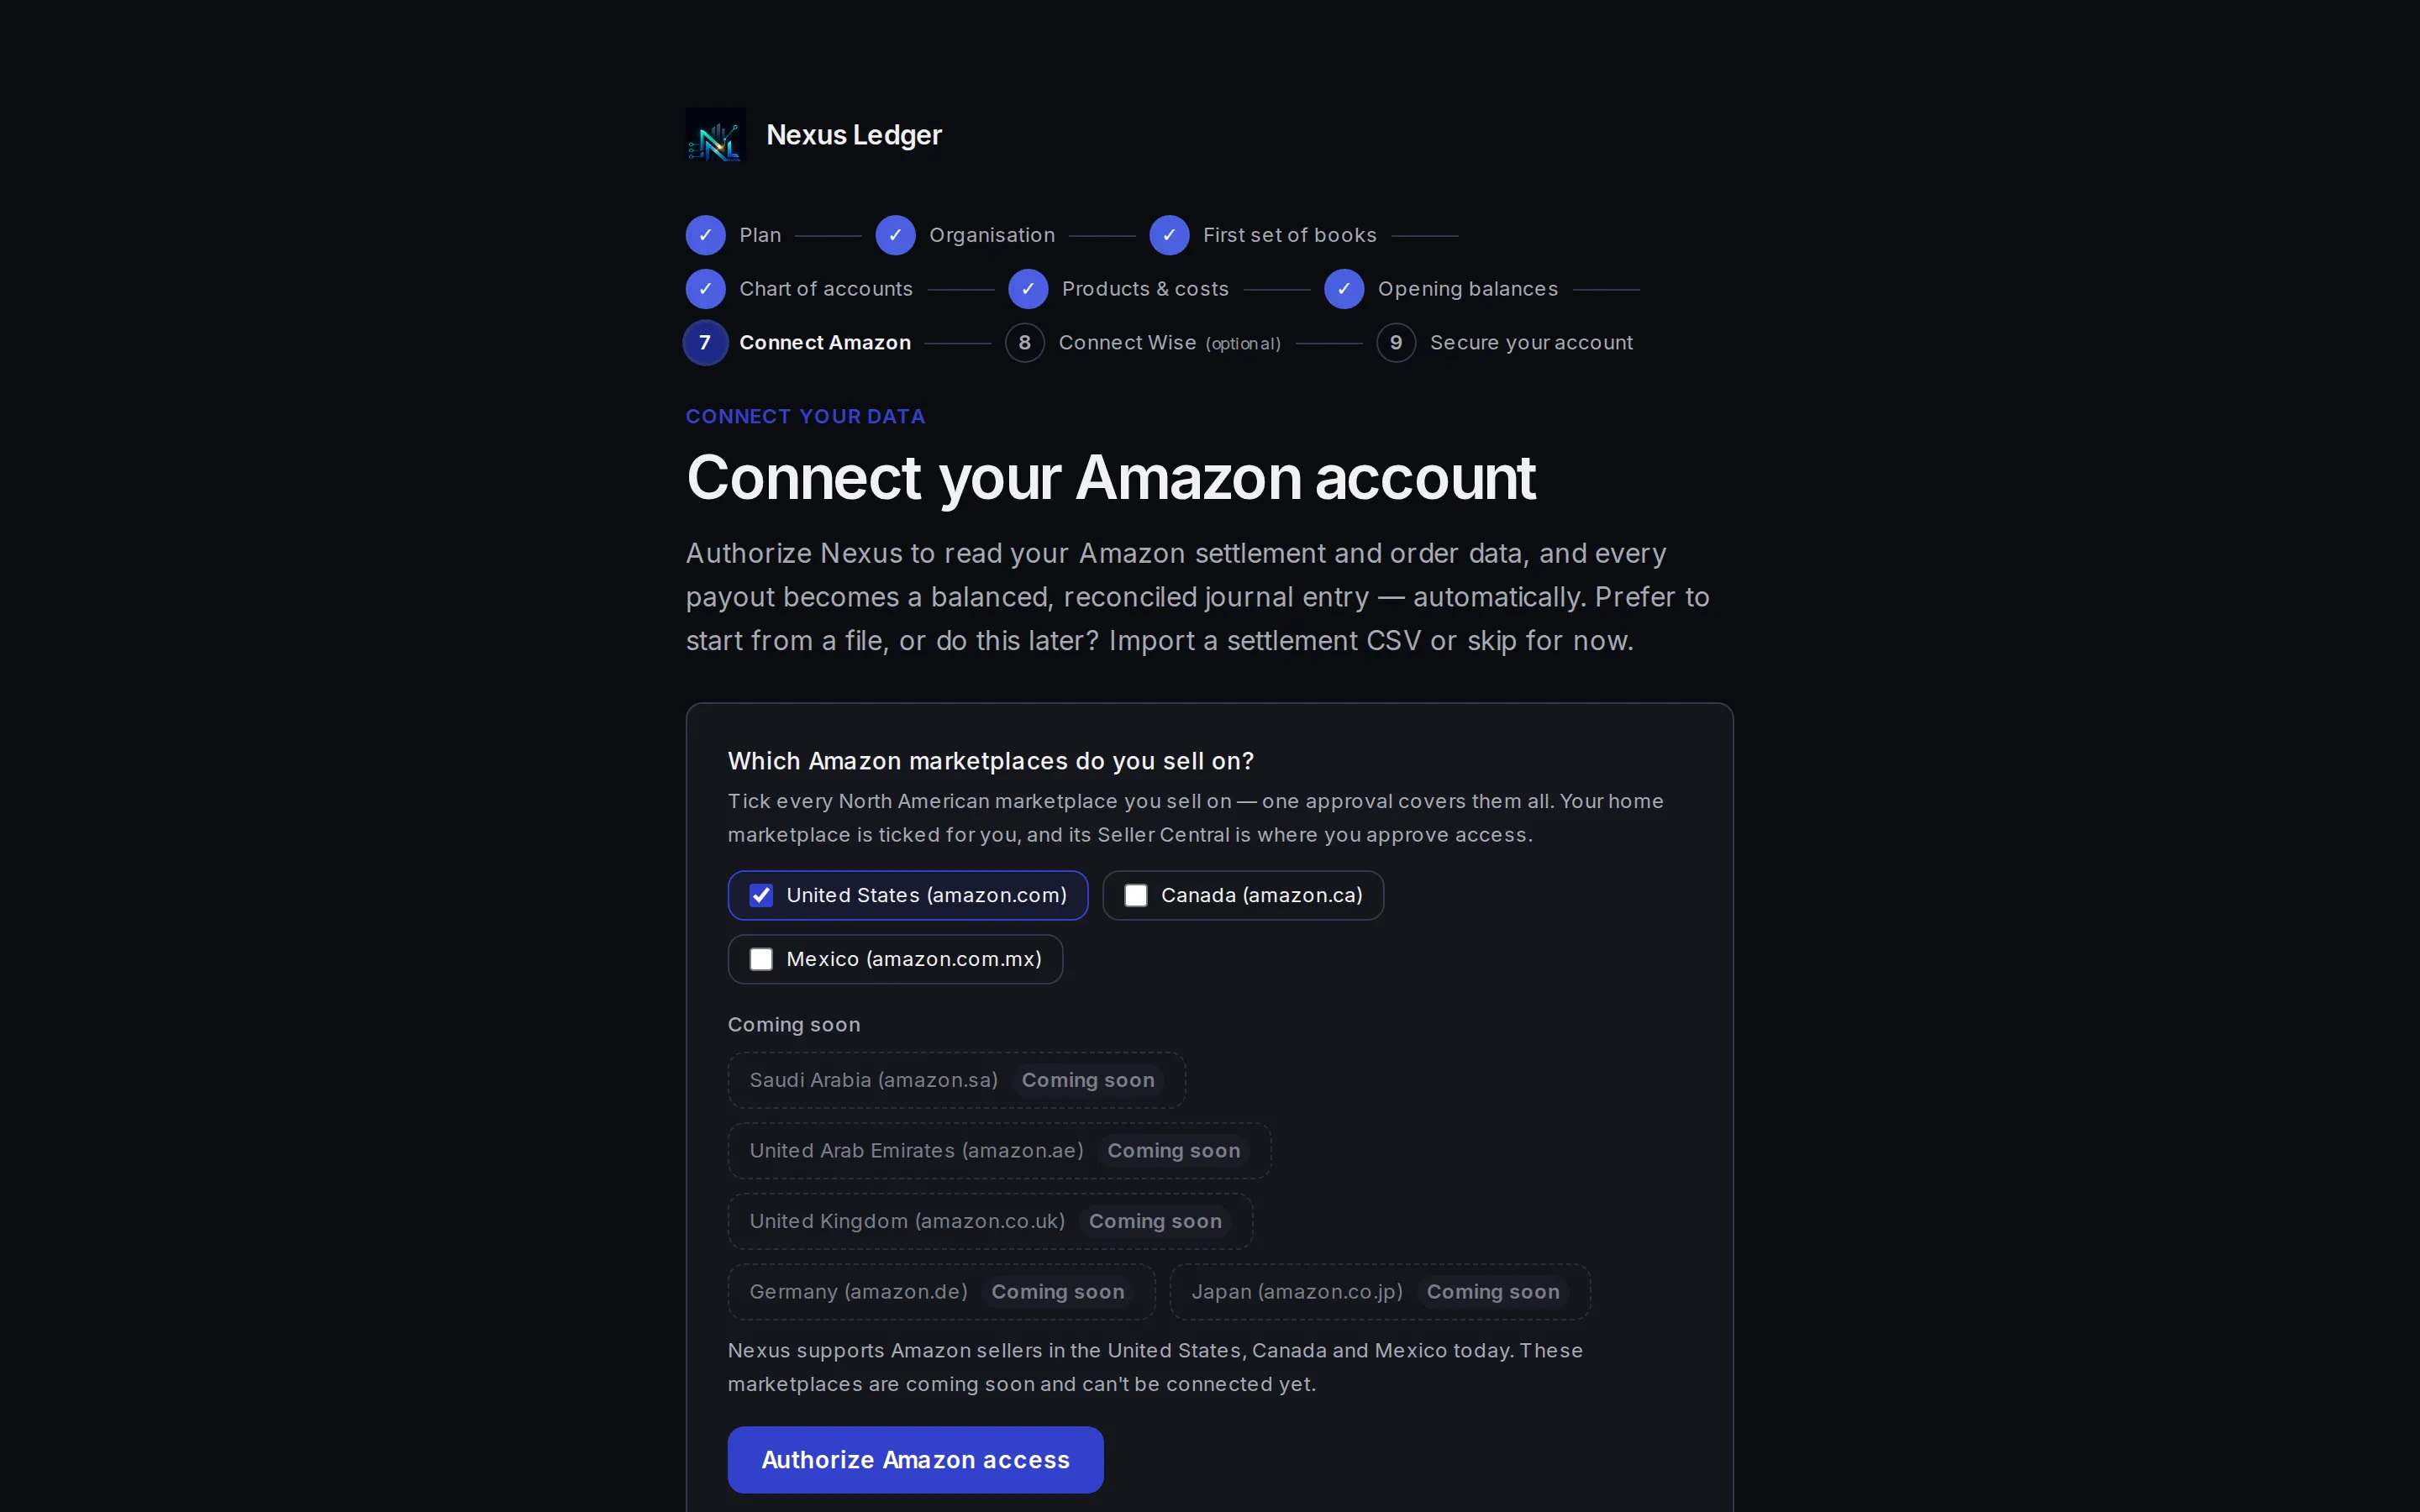
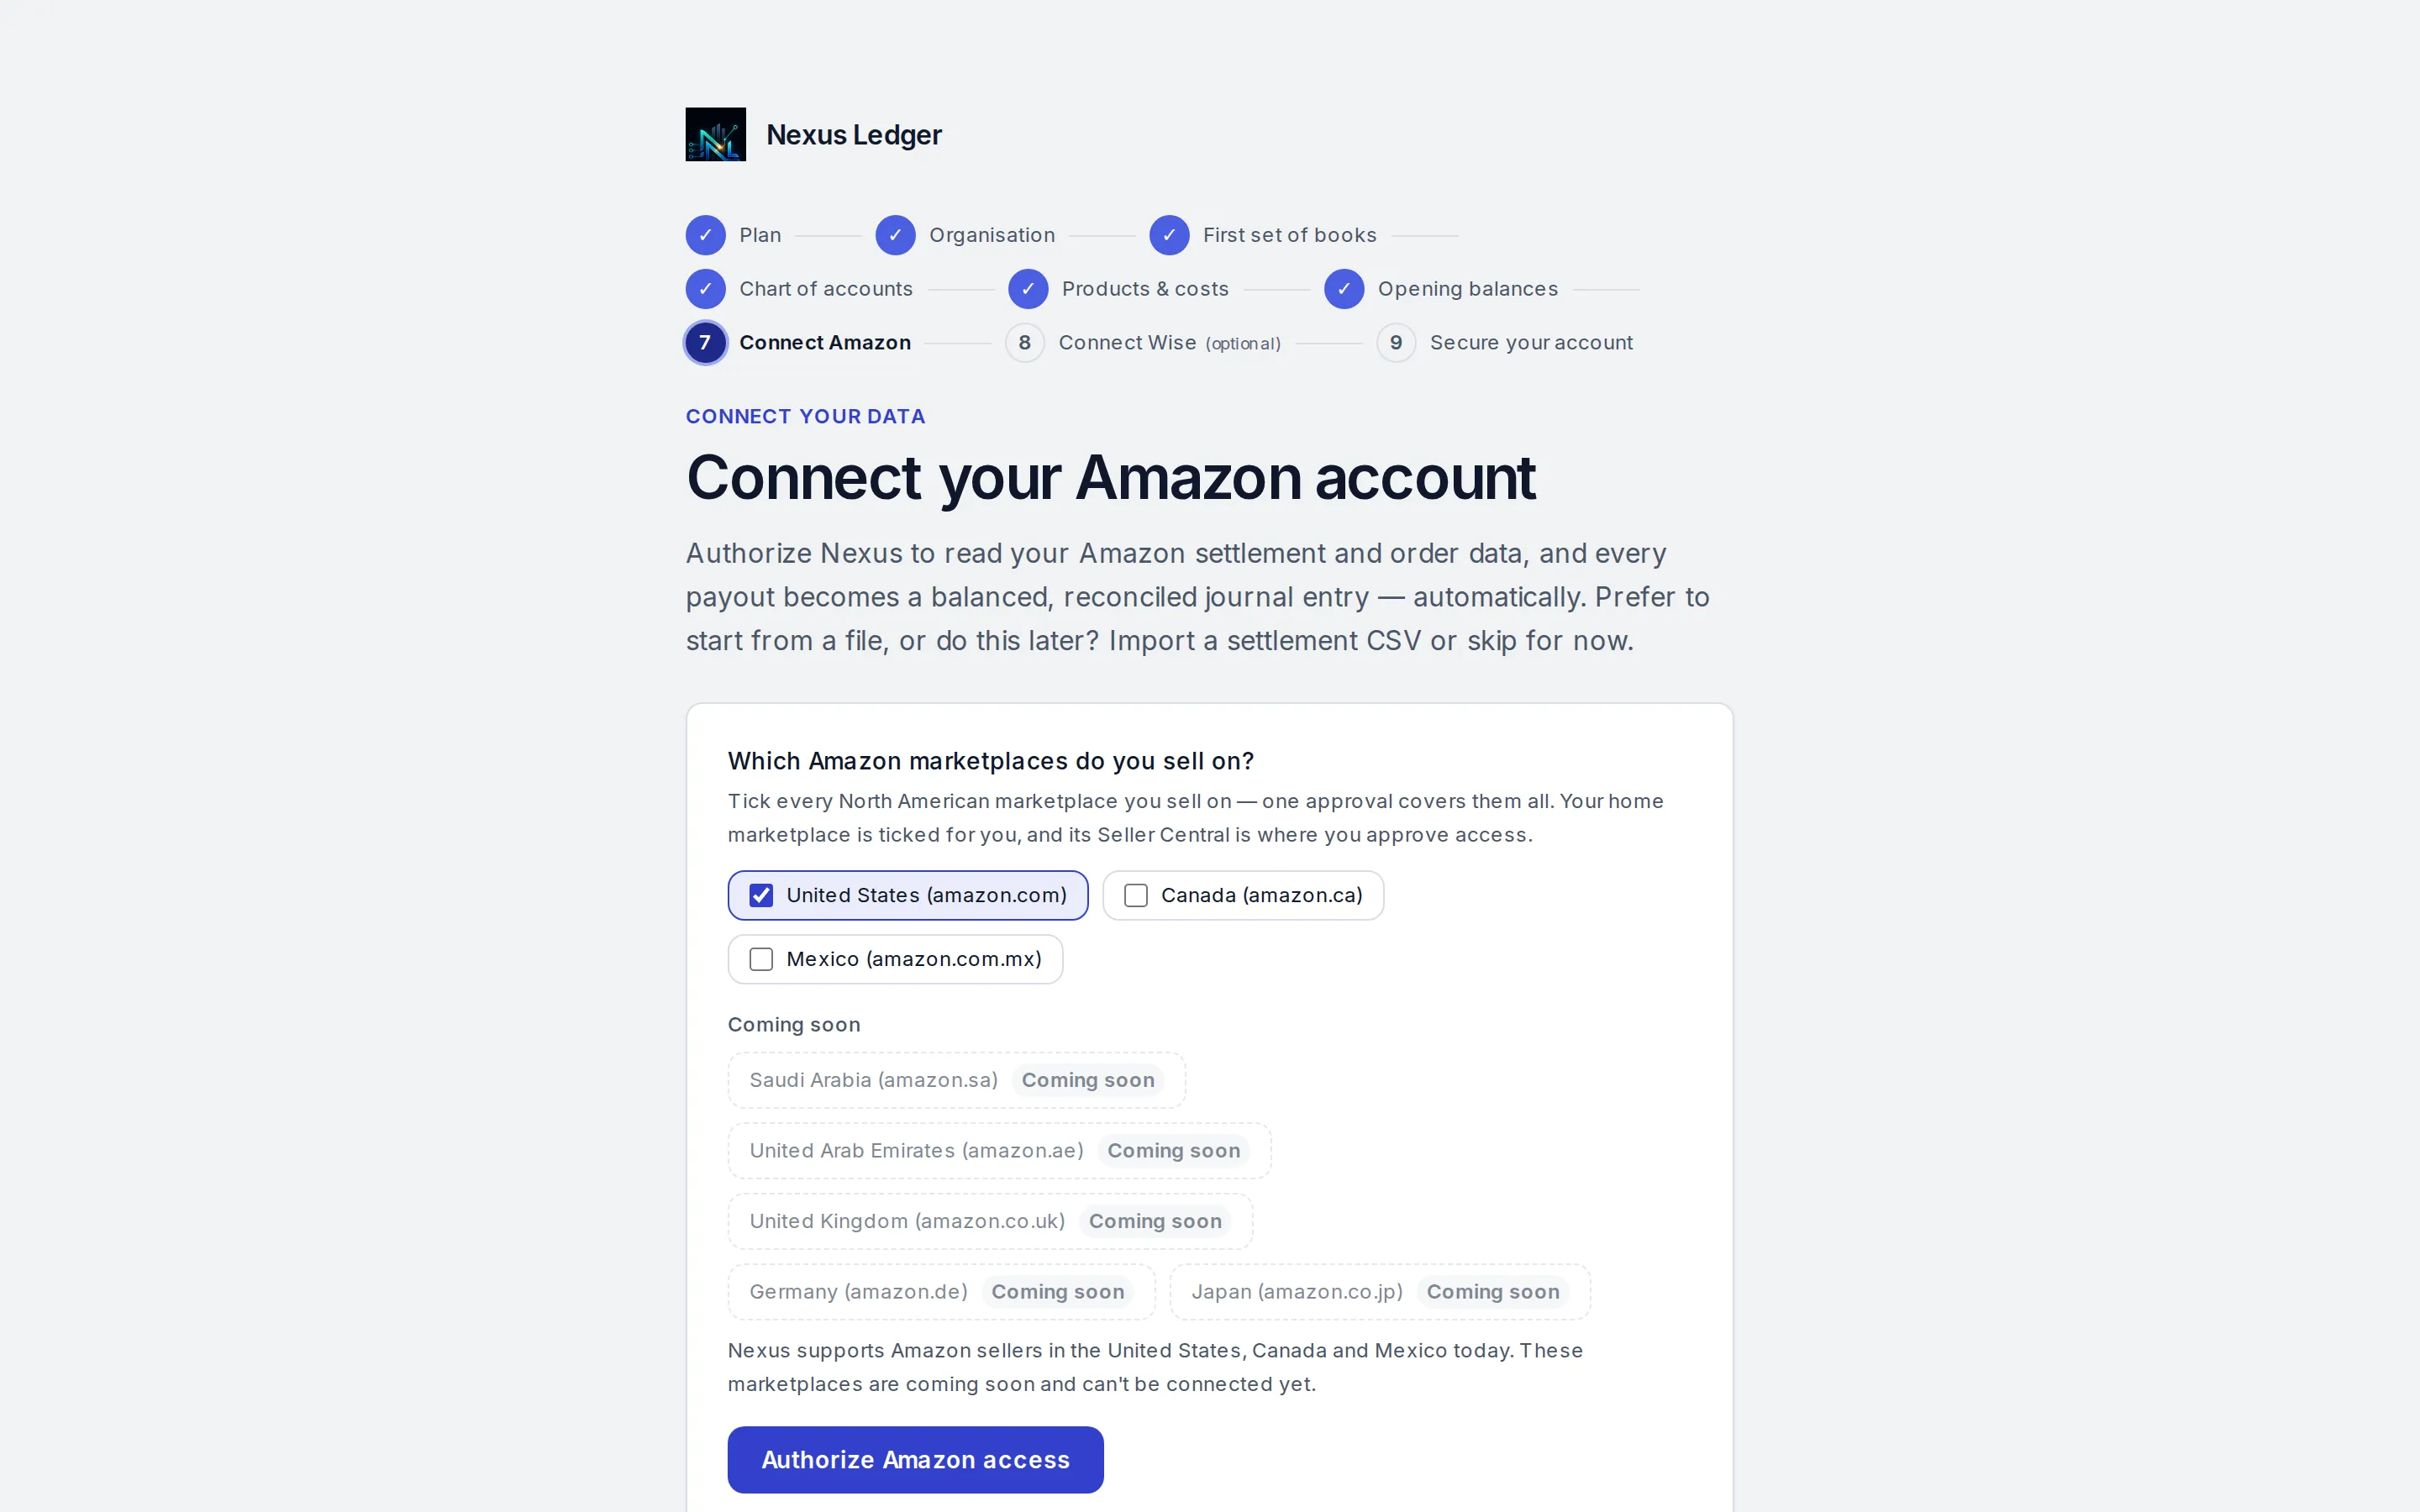
Connect your Amazon account. Step 2: Choose your marketplaces
Tick the marketplaces you sell on. Your home country is ticked for you, and countries that are not live yet show as coming soon.
Step 3: Authorize Amazon access
Press Authorize Amazon access. Amazon Seller Central asks you to approve, then returns you to Nexus. Once the setup grace period has ended, connecting asks for your second sign-in factor first.
Step 4: Watch your settlements arrive
After you authorize, settlements are pulled in the background and staged under Amazon settlements. Open one to compose its draft entry.
Step 5: If the connection does not complete
If the approval expires or is cancelled, press Authorize Amazon access again and approve promptly. You can also import a settlement file as a CSV instead, or skip the step and connect later; the setup checklist keeps showing it as open.


Common questions
Why does a settlement say Marketplace not identified?
Amazon's marketplace lookup sits outside the Finance and Accounting access you grant, so Nexus cannot always read it. When that happens it uses the marketplaces you ticked and your region's default. The amounts come from the settlement itself.
Does Nexus see my customers' names or addresses?
No. It asks for the Finance and Accounting role only and does not request buyer personal data.